

Deploying ML model via telegram bot


Hi, folks. In this article, I want to give you another example of how to deploy your model via a telegram bot.
In this case, I will use the same model that we used in ML Zoomcamp course in the 5th week. If you didn't take part in this course, I very recommend you do it, it's really cool.
We will use aiogram library for creating a telegram bot. You can find more information about this library here.
1. Create a telegram bot
First, we need to get a telegram token. To do this, you need to write to @BotFather and follow the instructions. After that, you will get a token. It looks like this: 1234567890:ABCDEFghIJKLmnopQRsTUVWxYZabcdeFGH
Save your token, it allows you to control your bot.
2. Create a virtual environment
I recommend you create a virtual environment for this project. I will use pipenv. You need the next libraries:
aiogram
scikit-learn
numpy
pipenv install aiogram scikit-learn==0.24. numpy
3. Use a pre-trained model
As I said, we will use a pre-trained model from the 5th week of the ML Zoomcamp course. You can find it in the GitHub repository of the course. Our model predicts the price of the car. You can find the model in the file model_C=1.0.bin. I also published this model in my GitHub repository.
4. Create a bot
Our bot will be straightforward, we just want to get data from the user in JSON format and return the probability of the user's churn. As we do the course with flask application. Yes, it is not the best user experience, but it's just an example of deploying a model in telegram.
It will be much better to ask users to answer questions one by one, give him/her options to choose and so on. But it's not the goal of this article. We can enhance our bot in the future. The structure of the bot is the next:
import necessary parts (Bot, Dispatcher, executor)
create a bot and dispatcher
create handlers, in my case for /start command and for text messages
in the end, we run the executor to start the bot and listen for messages (this part will be different when running the bot in AWS Lambda)
4.1. Import necessary parts and create a bot object
from aiogram import Bot, Dispatcher, executor, types

BOT_TOKEN = os.environ["BOT_TOKEN"]
bot = Bot(BOT_TOKEN)
dp = Dispatcher(bot)
Here I import objects from aiogram and create a bot object.
I read bot token from an environment variable.
4.2. Create handlers
@dp.message_handler(commands=["start"])
async def start(message: types.Message):
    await message.reply("Hello friend! To get prediction from model, send me a json data, and I will send you prediction.")

@dp.message_handler()
async def message(message: types.Message):
    try:
        customer = json.loads(message.text)
    except Exception as e:
        await message.reply("Invalid json data")
        return

    try:
        churn_probability = predict(customer)
    except Exception as e:
        await message.reply("Sorry. We could not make a prediction for your data")
        return

    churn = churn_probability >= 0.5

    if churn:
        await message.reply(
            f"The customer will churn. Probability: {round(churn_probability, 2)}"
        )
    else:
        await message.reply(
            f"The customer won't churn. Probability: {round(churn_probability, 2)}"
        )
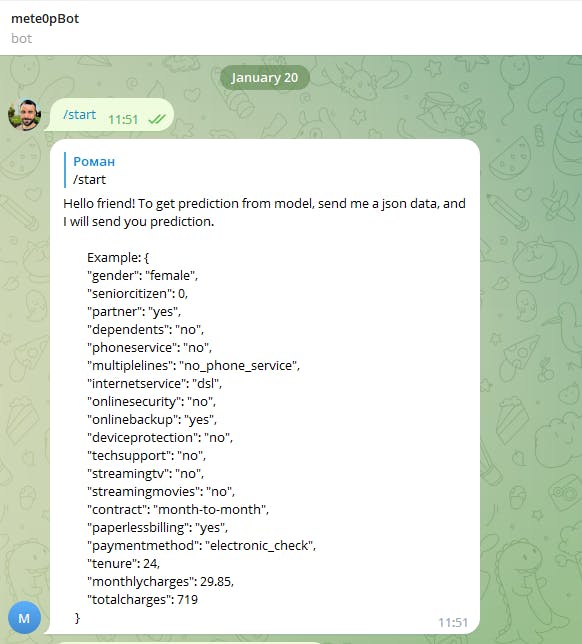
I created two handlers. The first one is for /start command. When a user sends /start command, the bot will send a message with instructions. And our second handler is for text messages. When a user sends a text message, the bot will try to parse it as JSON data. If it's not possible, the bot will send a message with an error. If it's possible, the bot will send a prediction.
4.3. Run the executor
if __name__ == "__main__":
    executor.start_polling(dp, skip_updates=True)
In the end, we run the executor to start the bot and listen for messages. We use skip_updates=True because we don't want to process old messages.
I skipped the function predict because it's the same as it was in the course. You can find it in my repo.
5. Prepare image for AWS Lambda
So our simple bot is ready, we could run it locally and test it.
To run the bot locally, you need to create a file .env at the root of the project. In this file, you need to write your bot token. It should look like this:
BOT_TOKEN=your_bot_token
This file will be used by pipenv, so you don't need to write your token in the code. To run the bot locally, you need to run the next command:
pipenv run python main.py
After you can send the /start command, and then send data in the correct format.
5. Deploy the bot to AWS Lambda
Well, we created a simple bot, but it has one drawback (actually not one). To be able to answer messages, our bot should be always running.
This technology is called polling. It means that our bot will be always asking telegram API if he has new messages, and if he has, the bot will handle them.
It's not very convenient, because we need our bot server to be running every time. Another way to deal with this problem is to use webhooks. It means that we will send messages to telegram. The telegram server will send them to our bot to handle.
It's much better because we don't need to have a constantly running server to handle messages. But we need to have a public URL for our bot, where telegram-api-server could send messages.
And this is where AWS Lambda comes in. We pay only for the time our bot is running. And we can create a public URL for our lambda function using AWS API Gateway.
To deploy the telegram bot on AWS Lambda we need to make some changes in our code.
5.1. Let's add logging
It will be very useful to debug our bot. We will use logging library for this. I show you the initialization of the logger, and then you can paste logger.info("messsage") in the places, you want to log something.
import logging

logger = logging.getLogger()
logger.setLevel(logging.INFO)

logger.info("Creating bot")
BOT_TOKEN = os.environ.get("BOT_TOKEN")

if not BOT_TOKEN:
    logger.error("BOT_TOKEN is not set")

bot = Bot(BOT_TOKEN)
dp = Dispatcher(bot)
5.2. Add a handler for webhook
We need to add a handler function, that will be triggered when our lambda is called.
def lambda_handler(event, context):
    pass
In this function, we need to push the event to the dispatcher. But as it is an asynchronous function, we need use asyncio to run it. Maybe it's a little confusing, but it's the way it works.
async def handle_event(event):
    update = types.Update.to_object(event)
    Bot.set_current(bot)
    await dp.process_update(update)

    return 'OK'

def lambda_handler(event, context):
    logger.info("Received event: " + str(event))
    return asyncio.get_event_loop().run_until_complete(handle_event(event))
5.3. Create a Dockerfile for lambda
We need to create a Dockerfile for lambda. It will be very similar to the Dockerfile we created for the flask application.
FROM public.ecr.aws/lambda/python:3.8

RUN pip install pipenv

COPY ["Pipfile", "Pipfile.lock", "./"]

RUN pipenv install --system --deploy

COPY model_C=1.0.bin .

COPY lambda_function.py .

CMD ["lambda_function.lambda_handler"]
6. Deploy the bot to AWS Lambda
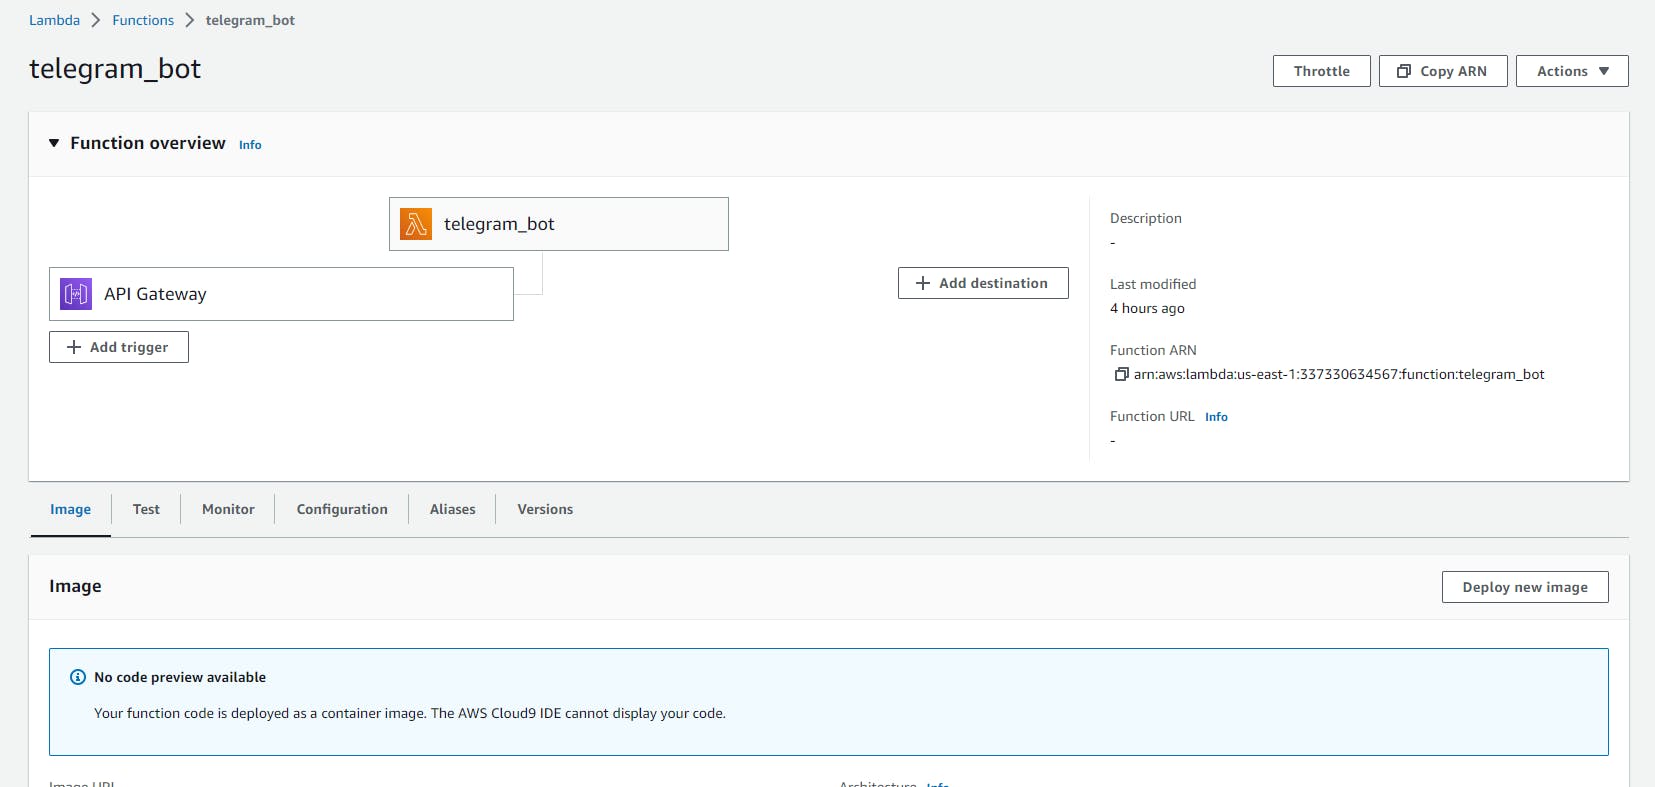
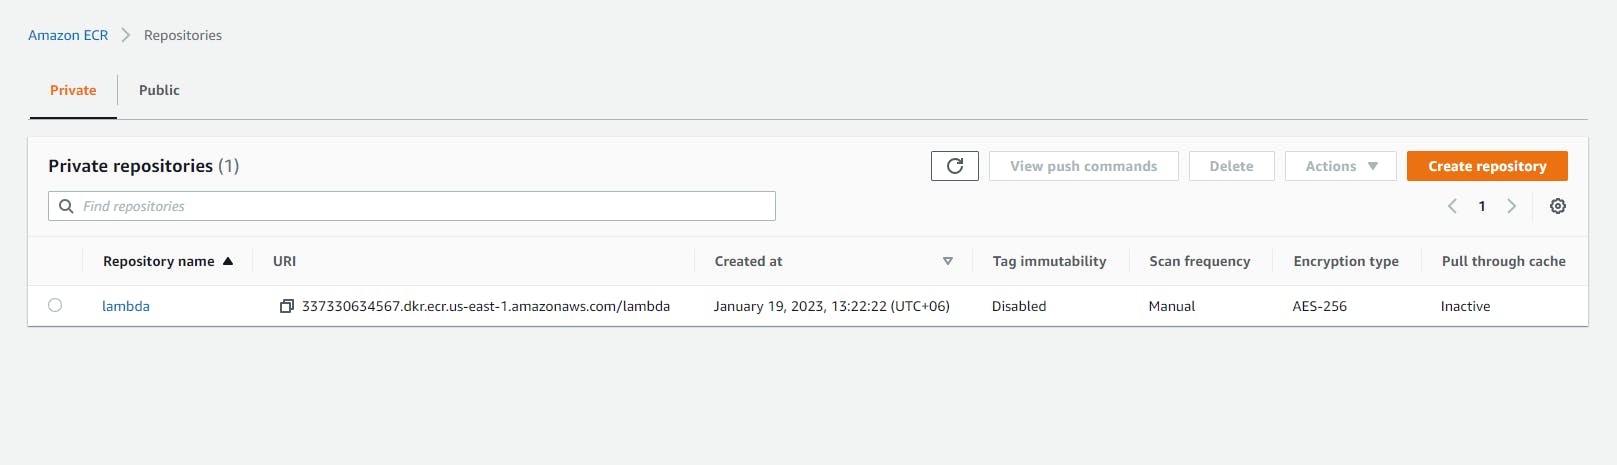
Now we need to create a lambda function. Also, we need to create an ECR repository for our image and push our image to it.
This process is described in the course. I will not repeat it here.
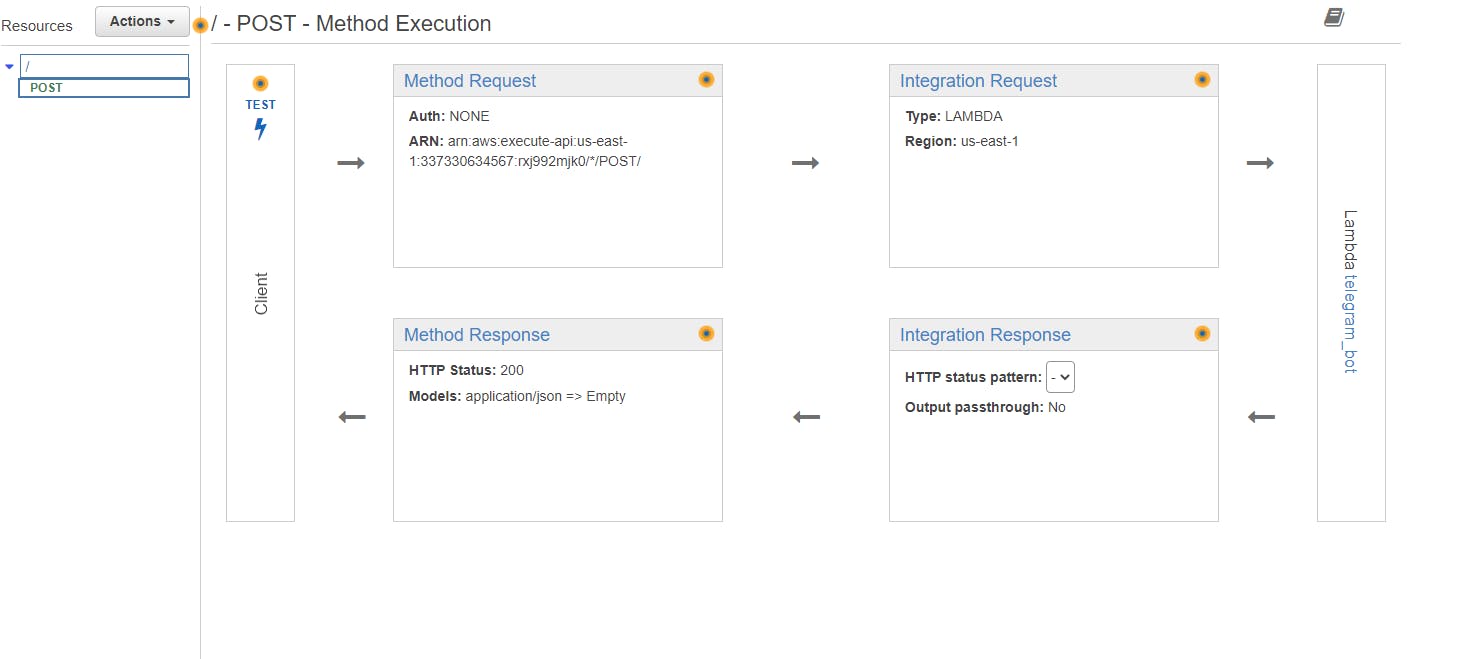
But I want to mention, that you need to create API Gateway for your lambda function, for POST requests.
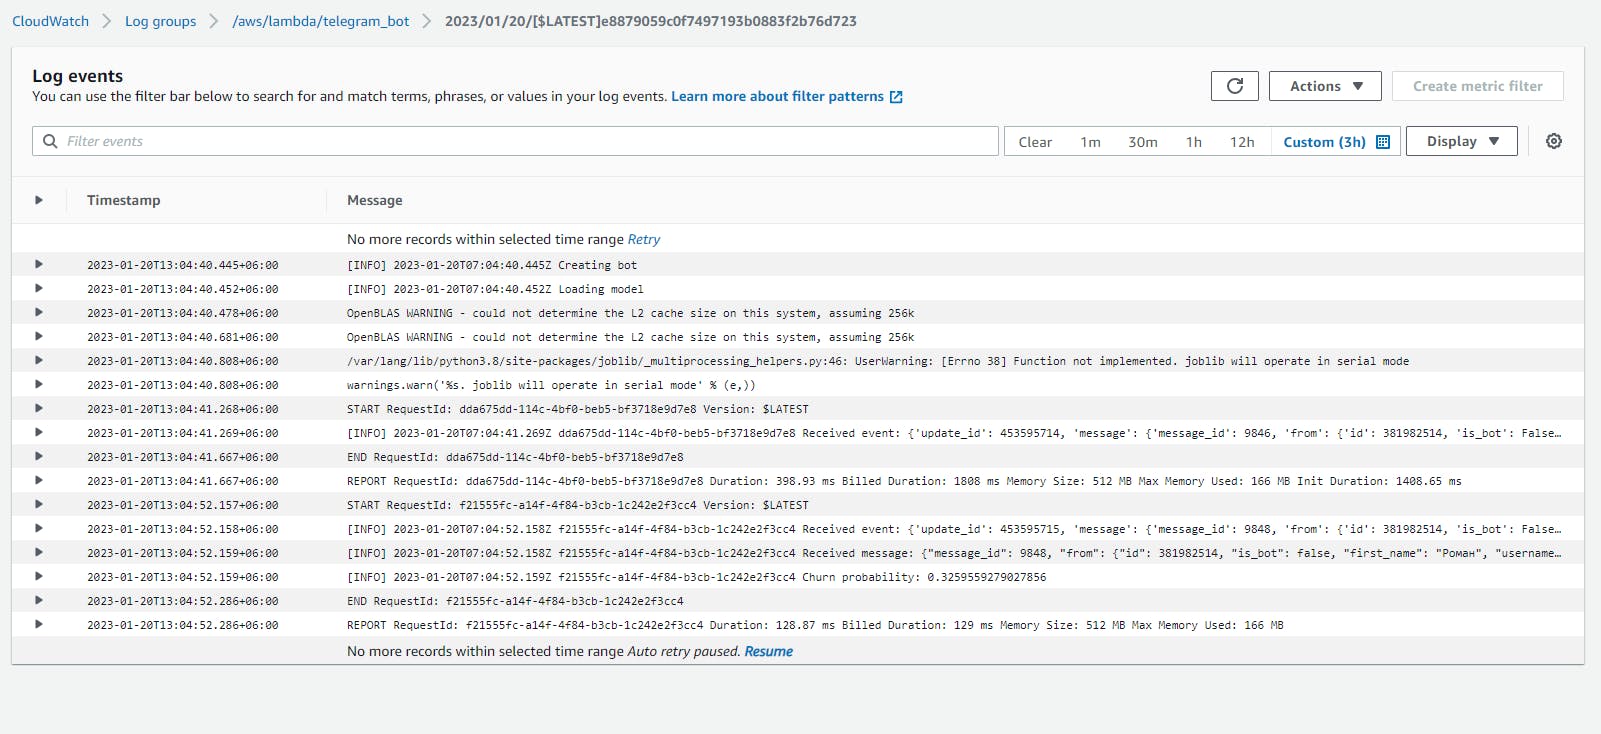
Here are some screenshots of my AWS Lambda configuration.
Lambda function
Gateway
ECR
CloudWatch
7. Set webhook
We can set a webhook for our bot using the following URL:
https://api.telegram.org/bot<token>/setWebhook?url=<url>
Where <token> is your bot token, and <url> is the url of your lambda function.
8. Test bot
9. Conclusion
In this article, I showed you another way how to make the user interface for your machine-learning model.
You can interact with users, and get text, pictures, and even voice messages.
Also, we run our bot on AWS Lambda, and it's very cheap. You don't need to have a full-time server to run your bot.